Sowing Native Plant Seeds in Winter

Baptisia seeds
Starting seeds inside isn't something we have much experience with. We don't have a green house, or much window space that isn't occupied. We do have two curious young kids and a dog, all who share a desire to dig in dirt when boredom strikes. (The dog once toppled two trays of veggie seedlings placed so far out of reach that there is no way the cause was anything other than ill intent.)
Even if we did have the perfect indoor spot for seeds, the hardening off and the warming pads seem like too much of a hassle. We're just not those kinds of gardeners. Our goal is low maintenance, high environmental impact, and, of course, a beautiful result. None of the concerns or challenges mentioned above matter when it comes to sowing the seeds of native plants.
Native plants, which give food and shelter to bugs, birds, and other beings, don't need much to thrive. They don't need to be babied. Their seeds stay dormant over the winter, then germinate at the right time in the spring. All you need to get started is seeds, dirt and some old plastic take-out containers with lids.T
Here are many step-by-step guides to winter sowing on the internet (such as on WinterSown.org), but the idea is simple: Most native seeds need a period of cold stratification to germinate, and therefore sowing them outdoors (in their natural conditions) over the winter works best.
You could plant them straight into the ground (direct sowing), but if you're not sure where you want your plants yet, and you don't want birds and squirrels to eat the seeds, use covered containers that might otherwise end up in the trash. Old milk jugs and clear take-out containers essentially create mini-greenhouses to protect your seeds from critters and get them to germinate a bit early and in higher numbers.
If you have a cold frame or similar structure, that would work just as well, but requires a little bit more work. (I'll cover the cold frame option in a minute.)
We were lucky to have collected a fair amount of seeds last summer and fall. Some were from our own garden, some were even from the garden at my office in Center City. But most of them came from the seed exchange that took place at the Native Plant Society of New Jersey's conference in the fall. We had about a dozen packets of different species, all natives. Most were herbaceous, but we had a few different shrub species as well.A few we did broadcast directly onto our meadow. But most we sowed in containers we'll store outside for the rest of the winter.
All you need to do is add some drainage holes to your containers, fill them with soil, sow the seeds, and water. And make sure there are holes punched in solid tops, or in the case of milk containers, the lid is kept off to allow air to circulate a bit and rain to keep the soil moist. Be sure to label the bottom of the containers to avoid fading caused by the weather.
Once you get your seedlings in the spring, you can either plant them directly into the ground or move them into regular containers to mature further. And they don't need the full hardening off that they would if you'd grown them indoors or in a traditional greenhouse - nature will take care of that for you.Here are some of the species we tried sowing:
Spicebush
Mountain Laurel
Coastal Pepperbush
New England Aster
White Wood Aster
Zigzag Goldenrod
New York Ironweed
Eastern Bluestar
Blue Lobelia
Butterfly Weed
Swamp Milkweed
Common Milkweed
Foxglove Beardtongue
Wild Indigo
Winter Sowing: Lessons Learned After 3 Years
Cold Frame
Our first-year experiments were a success, and I continued the winter sowing for each of the next two years, expanding a bit each time. It's an activity I look forward to every winter.
Sun-loving plants tended to have much better germination rates than shade plants in general. This makes sense, as a lot of shade plants rely heavily on vegetative propagation for spreading. The shrub seeds were a bit of a bust. I got some germination, but the seedlings died off quickly. You'd be better off propagating shrubs by cutting - I'll leave seed-grown shrubs to the pros. Some of my highest germination rates (and best growth once planted) were for foxglove beardtongue, mountain mint, switch grass, and New England aster.
Putting seeds outside around New Year's is enough time for cold stratification for everything we've grown, though there's no reason you couldn't put them out earlier.
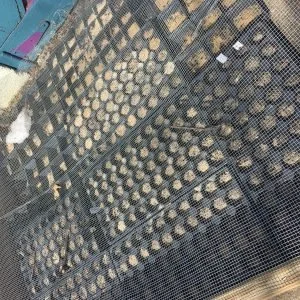
After the first year, we graduated from takeout containers (which worked fine) to re-using old plant pots and liner trays. This was because we greatly increased the number of seeds and species, and it was a bit more systematic. (Lindsay also asked that I make it a little tidier - to our neighbors I'm sure it literally looked like we just left a bunch of trash out all winter.) After switching from the lidded trays to regular pots, I built a simple border out of wood and covered it with wire mesh to keep the critters away.
Cover the seeds with a layer of sand (about a half centimeter or so deep). This kept heavy rains from spattering the dirt and seeds out of the pots, and kept the seeds in place near the surface.
One thing to keep in mind is that a lot of natives take a few years to flower when grown from seed, so patience is required. But the patience does pay off. I just dug up and divided some of the plants from my first year of winter sowing that have now outgrown the spaces where I planted them.
Finally, a note on ethics. If you're not collecting seeds from your own garden (or purchasing them), make sure you have permission from the landowner to do so. And be sure to leave plenty of seeds behind so the plant populations can continue propagating on their own (not to mention the fact that many seeds are an important food source for wildlife).